
Note before starting: Plug in the Wi-Fi router and connect the network cable from the main modem to the router's WAN port (usually blue). Then, use your phone to connect to the default Wi-Fi name printed on the bottom of the router.
Access the admin page
Open a web browser (Safari, Chrome...) on your phone.
- Enter in the address bar: 192.168.0.1
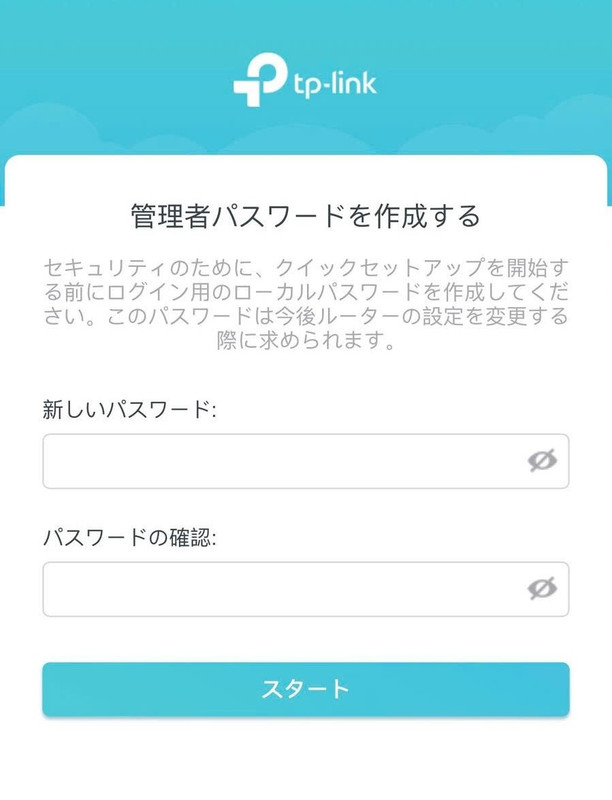
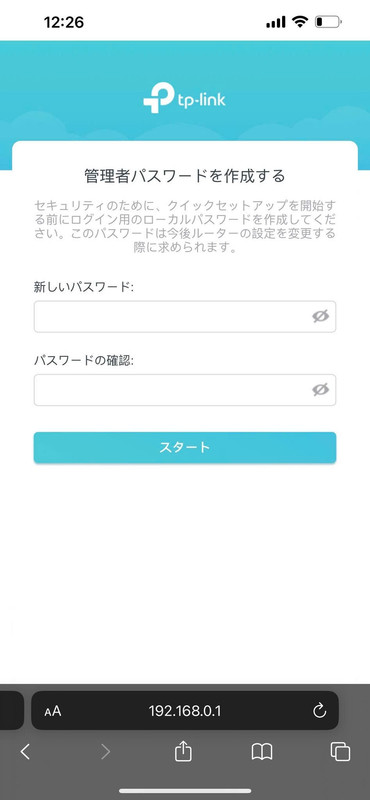
Create an admin password
The system requires creating a new password for security. Enter one of the following passwords:
admin123
or
admin@
or
admin
- Enter the exact same password in both boxes (the two lines must be identical).
- Do not use capital letters.
After entering, click the blue button スタート (Start).
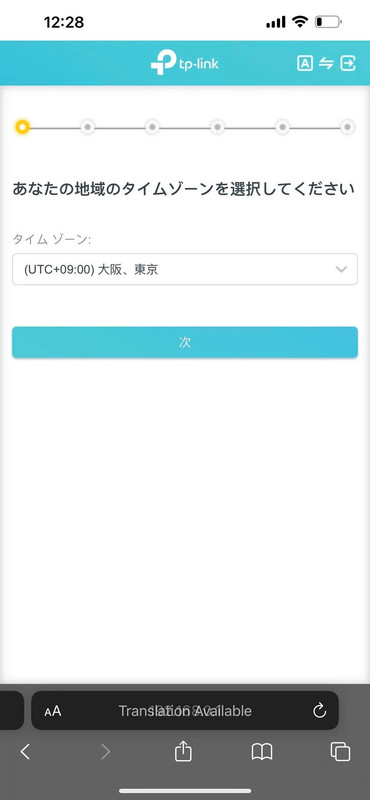
Select the time zone
On the region setup screen, click the drop-down box and find the line with the text:
(UTC+09:00) 大阪、東京
After selecting the correct Japan time zone, click the blue button 次 (Next) below.
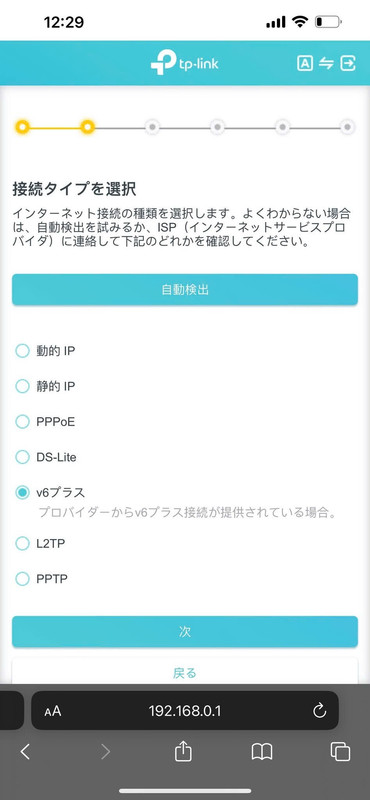
Select network connection type
The screen will display connection types. Check the circular box with the word:
PPPoE
After selecting PPPoE, scroll down and click the blue button 次 (Next).
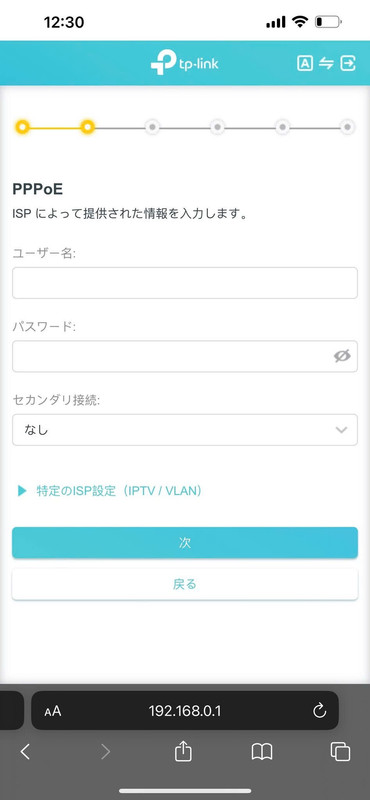
Enter internet provider account
Take the account information paper sent by your internet provider (ISP). Enter the exact information in the 2 boxes:
-
1
Top box (User Name / ID): Enter the ID from your paper.
(Example: b202... @sbl) -
2
Second box (Password): Enter the password that comes with that ID.
Leave the "Secondary connection" (セカンダリ接続) as "None" (なし). Finally, click the 次 (Next) button.
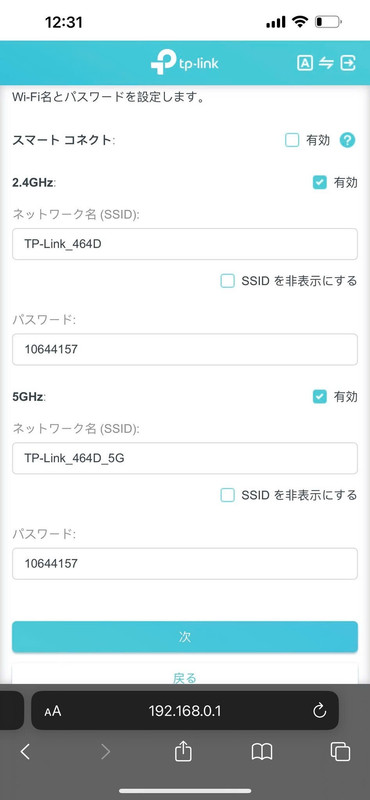
Set up Wi-Fi Name & Password
In this step, the system allows you to change the router's name and password.
For a faster setup process, you do not need to change anything (keep the device's default name and password).
Just scroll down and click the blue button 次 (Next).
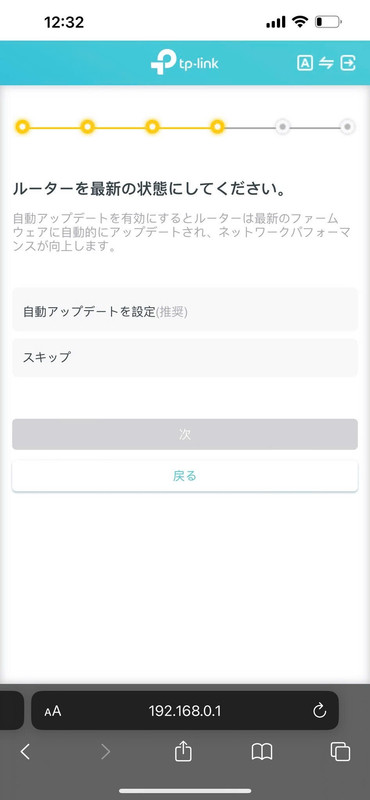
Skip Firmware update
The system will ask if you want to turn on automatic software updates for the device.
To save time, select the second option:
スキップ (Skip)
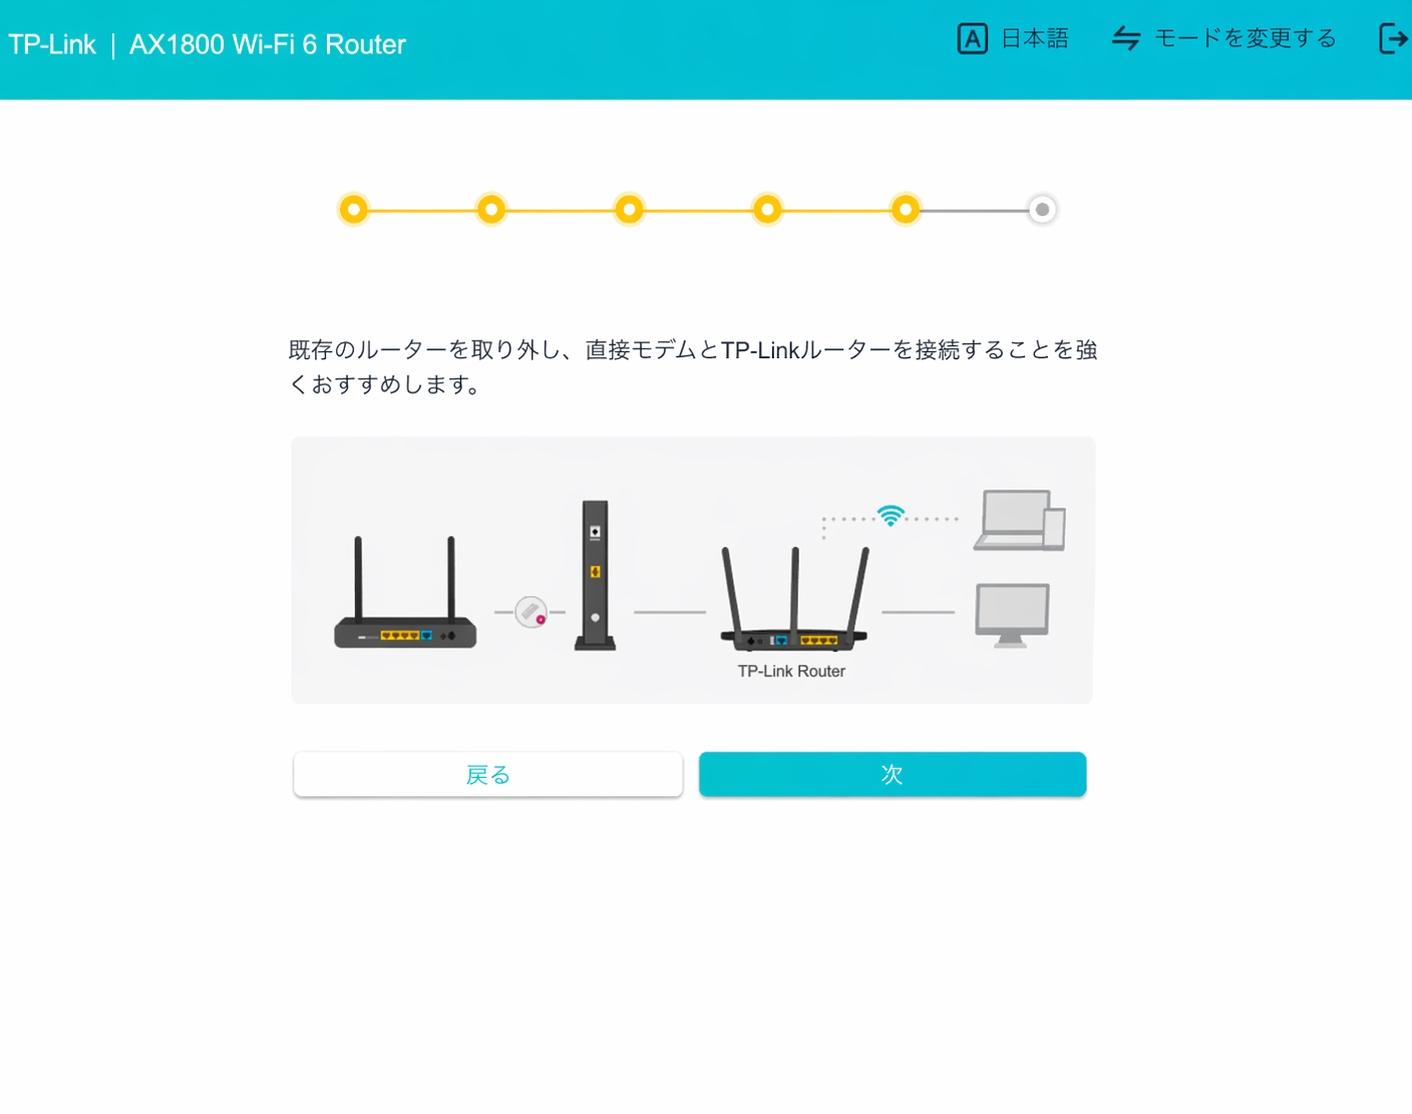
Confirm device connection
The screen will show a diagram instructing how to connect the network cable (from Modem to Router).
If you have plugged it in correctly as noted at the beginning, just click the blue button 次 (Next).
Skip TP-Link ID login
The system will suggest you log in with your TP-Link ID account for remote management. This step is not mandatory.
To finish the setup process now, look at the bottom of the screen and click the blue button:
スキップ (Skip)

Congratulations on your successful setup!
Now you can connect to the Wi-Fi network and access the internet normally.